Pasta With Mushroom & Asparagus Recipe
Pasta is such a versatile dish; one can have it for breakfast or as an evening snack or a meal. You can serve it as a main course or pair it with soup for a light and fulfilling meal. It’s easy to make and you can add any flavor or ingredients, vegetables as per your choice. This recipe serves two people and takes just 35 minutes to prepare.
What You’ll Need:
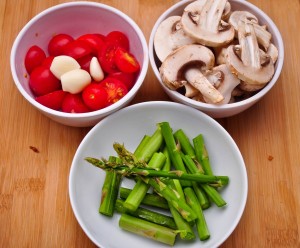
- 1 cup farelle pasta stoned ground whole wheat
- ½ cup mushrooms
- 6-8 cherry tomatoes, sliced
- 3-4 asparagus stalks
- 2 tablespoon grape seed oil
- salt and pepper to taste
Let’s Cook!
1. Boil four cups of water, add pasta to boiling water.
2. Add 1 tablespoon salt and let it cook for 15-20 minutes or until cooked, then turn off the heat and drain the excess water.
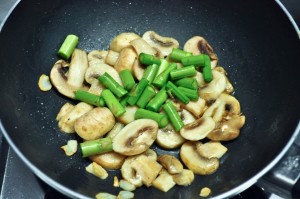
3. Heat a pan with oil, add the garlic and mushrooms, then sauté for 5 minutes.
4. Add the asparagus and sauté for 5 minutes.
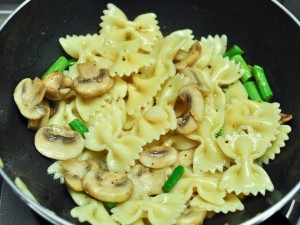
5. Add the pasta, salt and pepper.
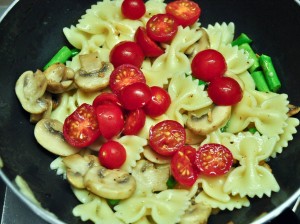
6. Add the tomatoes and sauté for 5 minutes.
7.Serve warm. It tastes great as it is and can also be enjoyed with other mixed veggies of your choice.
One Pot Cantonese Noodles Recipe
If you love Chinese take-out, lo-mien, or plain easy meals, this recipe is a sure treat. A balanced meal which comes together in mere minutes and uses only one pot is everyone’s friend. With this one-pot Cantonese noodles recipe, putting together a healthy dinner fix is a breeze.
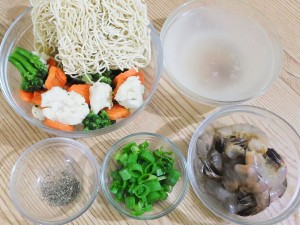
What You’ll Need
- ½ lb prawns (or sliced chicken breast, or a combination of the two)
- Salt and pepper to taste
- ½ cup chopped spring onions
- 2-3 cups frozen vegetable mix of carrots, broccoli, and cauliflower
- 2 cups chicken stock (you may need to add ½ cup water)
- 4-5 ounces of Cantonese noodles (you may also use egg noodles)
Let’s Make Some Easy-Peasy Cantonese Noodles!
1. Have all your ingredients ready.
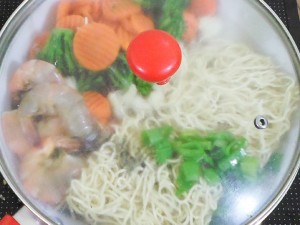
2. Place everything in a deep enough pan (except half of the spring onions).
3. Cover for 3 minutes over medium-high heat.
4. Give it a stir to ensure the noodles cook through and the veggies and prawns are done nicely as well. At this point, you may add soy sauce for color but it’s not that important. Season with salt and pepper.
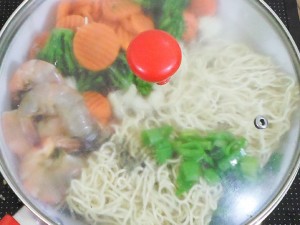
5. Cover again for another 3 minutes until the noodles has absorbed all the liquids.
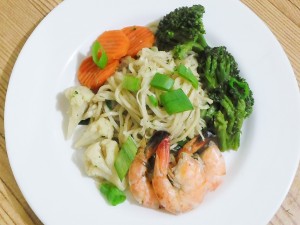
6. Serve with a sprinkling of chopped green onions, enjoy! This recipe makes 2-3 generous servings.
Top 5 Healthy Hydration Tips
If you’ve been interested in health and fitness for a while then one piece of advice that you’re likely to have heard over and over again is to ‘drink at least 8 glasses of water per day’. While this is sound advice, there’s a lot more to staying healthy while you hydrate than just drinking water. In this article I’m going to be taking a deeper look at healthy hydration and listing five of the best tips for staying healthy as you rehydrate.
Tip 1 – Consume The Equivalent Of 8 Glasses Of Water Per Day
As mentioned above, many health and fitness publications recommend drinking eight glasses of water per day. However, what most of these publications fail to state is that you can consume this water in any form. So if you’re finding drinking eight glasses of water per day difficult, try getting some of your water from other sources such as black tea, coffee, green tea, water rich fruits or water rich vegetables. Not only does this add variety and stop you getting bored when trying to hit your water target but it also allows you to fill up on plenty of other health boosting nutrients in the process.
Tip 2 – Mix Up Your Water Intake With Coffee & Tea
Black tea, coffee and green tea are all excellent ways to top up your water levels and stay hydrated. In addition to this, all of these drinks contain a number of health boosting nutrients. Black tea and green tea contain high levels of flavan-3-ols which fight allergies, boost your blood heath, protect against chronic disease, strengthen your immune system and much more. Coffee on the other hand is rich in hydroxycinnamic acids which reduce inflammation within the body, strengthen your bones and your heart, relieve chronic pain and much more. Therefore, by drinking coffee and tea you’ll not only prevent dehydration but you’ll also be able to enjoy all these health benefits.
Tip 3 – Avoid All Types Of Soda
Although it contains water, soda is something you need to avoid if you want to hydrate in a healthy way. Regular soda is loaded with sugar and by drinking it continuously, you’ll gain unwanted body fat. Diet soda doesn’t contain the calories or regular soda but it’s packed full of harmful chemicals which have numerous negative implications when it comes to your health. So if you’re currently drinking lots of soda, make some changes today and replace it with coffee, tea or water.
Tip 4 – Enjoy Water Rich Fruits & Vegetables
Water rich fruits and vegetables are another excellent way to fill up on water while also benefiting from numerous health boosting vitamins, minerals and phytonutrients. Most fruits and vegetables contain a good amount of water but if you’re looking for the best options in terms of hydration, go for broccoli (89% water), grapefruit (90% water), lettuce (96% water) and watermelon (91% water).
Tip 5 – Get A Drink Alarm App
One of the biggest reasons people find consuming the equivalent of eight glasses of water per day difficult is that they simply forget. They’re not used to drinking this volume of water and then once the day gets going, they get wrapped up in their usual routine and don’t follow through with their plans to stay hydrated. The good news is that there is a relatively simple solution to this problem – drink alarm apps.
Drinks alarm apps are simple smartphone applications that log your daily water intake and remind you to drink water throughout the day. They’re incredibly easy to use and once set up, all you have to do is confirm that you’ve drank water with each reminder and the app will take care of the rest. So if you find that your poor memory is often the reason you don’t get enough water, grab a drink alarm app today.
Summary
By following the tips above, you’ll not only provide your body with all the water it needs but you’ll also fill up on a range of health boosting nutrients and avoid excess liquid calories. In addition to this, you’ll be getting your water from plenty of different sources, so you’ll never get bored.
HIIT Cardio Machine Workouts
One of the biggest complaints people have about cardio machines is that they find the long, steady state workouts boring and unchallenging. However, with HIIT (High Intensity Interval Training), you can add some pace and excitement to your cardio machine based workouts. Keep reading for 3 of the best cardio machine HIIT workouts.
1 – HIIT Exercise Bike Workout
This simple HIIT exercise bike workout is fast, fun and varied. One of the best things about this workout is that despite its high intensity, it places very little pressure on your joints and allows you to enjoy an efficient workout without experiencing pain or swelling in your ankles, hips or knees.
The table below contains instructions for this HIIT exercise bike workout:
| Phase | Intensity | Time (seconds) |
| 1 | High Intensity Cycling | 10 |
| 2 | Low Intensity Cycling | 20 |
| 3 | High Intensity Cycling | 15 |
| 4 | Low Intensity Cycling | 20 |
| 5 | High Intensity Cycling | 20 |
| 6 | Low Intensity Cycling | 30 |
| 7 | High Intensity Cycling | 30 |
| 8 | Low Intensity Cycling | 20 |
| 9 | High Intensity Cycling | 30 |
| 10 | Low Intensity Cycling | 20 |
| 11 | High Intensity Cycling | 20 |
| 12 | Low Intensity Cycling | 15 |
| 13 | High Intensity Cycling | 20 |
| 14 | Low Intensity Cycling | 10 |
| 15 | High Intensity Cycling | 20 |
The workout itself is highly flexible and can take between 5 minutes and 30 minutes depending on how much time you have available. Simply follow the recommendations below to adjust the duration of this HIIT exercise bike workout:
- For a 5 minute workout, complete phases 1-5 once
- For a 10 minute workout, complete phases 1-15 twice
- For a 15 minute workout, complete phases 1-15 three times
- For a 20 minute workout, complete phases 1-15 four times
- For a 25 minute workout, complete phases 1-15 five times
- For a 30 minute workout, complete phases 1-15 six times
2 – HIIT Treadmill Speed Workout
If you want to increase your running speed, this HIIT treadmill speed workout is a great tool that takes only 15 minutes to complete. With just a couple of HIIT treadmill speed workouts each week, you’ll find that you’re able to sprint faster and longer than you ever have done before.
The table below contains instructions for this HIIT treadmill speed workout. If you can’t currently sprint at 15kph or can sprint faster than 15kph, begin the workout at your maximum sprint speed and adjust the other workout speeds accordingly:
| Phase | Speed (kph) | Time (seconds) |
| 1 | 15 | 10 |
| 2 | 5 | 30 |
| 3 | 15 | 20 |
| 4 | 5 | 30 |
| 5 | 15 | 30 |
| 6 | 5 | 30 |
| 7 | 14 | 10 |
| 8 | 5 | 30 |
| 9 | 14 | 20 |
| 10 | 5 | 30 |
| 11 | 14 | 30 |
| 12 | 5 | 30 |
| 13 | 13 | 10 |
| 14 | 5 | 30 |
| 15 | 13 | 20 |
| 16 | 5 | 30 |
| 17 | 13 | 30 |
| 18 | 5 | 30 |
| 19 | 12 | 10 |
| 20 | 5 | 30 |
| 21 | 12 | 20 |
| 22 | 5 | 30 |
| 23 | 12 | 30 |
| 24 | 5 | 30 |
| 25 | 11 | 10 |
| 26 | 5 | 30 |
| 27 | 11 | 20 |
| 28 | 5 | 30 |
| 29 | 11 | 30 |
| 30 | 5 | 30 |
| 31 | 15 | 10 |
| 32 | 5 | 30 |
| 33 | 15 | 20 |
| 34 | 5 | 30 |
| 35 | 15 | 30 |
| 36 | 5 | 30 |
3 – HIIT Treadmill Incline Workout
This treadmill HIIT incline workout is a fantastic alternative to the speed workout above that helps to develop your strength and stamina while running. It takes just 15 minutes to complete and is both fun and challenging.
The table below contains instructions for this HIIT treadmill speed workout:
| Phase | Speed (kph) | Time (seconds) |
| 1 | 15 | 10 |
| 2 | 5 | 30 |
| 3 | 15 | 20 |
| 4 | 5 | 30 |
| 5 | 15 | 30 |
| 6 | 5 | 30 |
| 7 | 14 | 10 |
| 8 | 5 | 30 |
| 9 | 14 | 20 |
| 10 | 5 | 30 |
| 11 | 14 | 30 |
| 12 | 5 | 30 |
| 13 | 13 | 10 |
| 14 | 5 | 30 |
| 15 | 13 | 20 |
| 16 | 5 | 30 |
| 17 | 13 | 30 |
| 18 | 5 | 30 |
| 19 | 12 | 10 |
| 20 | 5 | 30 |
| 21 | 12 | 20 |
| 22 | 5 | 30 |
| 23 | 12 | 30 |
| 24 | 5 | 30 |
| 25 | 11 | 10 |
| 26 | 5 | 30 |
| 27 | 11 | 20 |
| 28 | 5 | 30 |
| 29 | 11 | 30 |
| 30 | 5 | 30 |
| 31 | 15 | 10 |
| 32 | 5 | 30 |
| 33 | 15 | 20 |
| 34 | 5 | 30 |
| 35 | 15 | 30 |
| 36 | 5 | 30 |
Summary
With these 3 HIIT cardio machine workouts, you can breathe new life into a stale cardio routine, fire up the amount of calories you burn and complete your workouts in 30 minutes or less. So pick your favorite routine and take your cardiovascular fitness to the next level today.
Top 5 Healthy Snacking Tips
For many people, snacking is their Achilles heel when it comes to healthy eating. They manage to adapt their main meals and make them healthy with relative ease but when they get hungry between meals, the lure of candy, chocolate or chips becomes too much. The good news is that with a little extra preparation, you can ensure that unhealthy snacks don’t get the better of you and enjoy healthy snacks instead. In this article I’m going to be showing you how to do just that by listing five top healthy snacking tips.
Tip 1 – Satisfy Your Sweet Tooth With Fruits
Fruits are a fantastic low calorie alternative to sugary snacks. Due to their relatively high concentration of fiber and water, they’re much lower in calories than sugary snacks. In addition to this, they contain plenty of health boosting vitamins, minerals and phytonutrients which enhance your health in countless ways. However, the best thing about fruits is that there are so many different varieties to choose from that you’ll easily be able to find lots of different types you like.
Tip 2 – Replace Soda With Smoothies
Soda contains no nutrients and often packs well over 100 calories per glass. Due to its high refined sugar content, soda also has an adverse effect on your energy levels and causes them to surge and crash in rapid succession.
Smoothies on the other hand contain high levels of natural, health boosting nutrients and fewer calories. Their high fiber content also ensures that the energy you get from smoothies is released in a slower, more controlled fashion and provides you with a steady, consistent flow of energy.
Therefore, by swapping soda for smoothies, you still get to enjoy a sweet tasting drink, consume less calories in the process and enjoy the enhanced health and energy that smoothies provide.
Tip 3 – Substitute Chips For Seasoned Nuts & Seeds
Chips are a popular but unhealthy snack that contain large amounts of calories. However, the most dangerous thing about chips in terms of health is that they contain large amounts of unnatural chemicals which increase your risk of chronic disease, interfere with your body’s processes and much more.
To eliminate these harmful chemicals while also enjoying a snack that tastes similar to chips and is packed full of protein and healthy fats, try making up your own bags of seasoned nuts and seeds. To do this, simply add a tablespoon of extra virgin olive oil to a plastic freezer bag with the seasonings of your choice (black pepper, chili powder, garlic and salt are all good options). Then add 4 oz. of nuts or seeds to the plastic freezer bag, hold the opening of the bag tight in your hand, give it a good shake and pour the seasoned nuts or seeds onto a baking tray. After this, place the baking tray in the oven for 20 minutes at 275°F, leave the nuts or seeds to cool for a couple of hours, divide them up into four portions, place each of these four portions in a small sealed plastic bag and enjoy a bag whenever you fancy a snack.
Tip 4 – Make Your Own Cold Cuts Of Meat
Cold cuts of meat are another excellent healthy snacking option that contain plenty of protein. However, store bought cold cuts of meat are often loaded with harmful artificial preservatives.
To eliminate these preservatives, try making your own cold cuts of meat. Simply chop your favorite choice of meat into thin slices, soak these slices in a homemade marinade for a couple of hours, cook them as normal and then snack on them whenever you feel hungry.
Tip 5 – Fill Up On Greek Yogurt
Greek yogurt is a top healthy snacking choice that contains high levels of healthy fats, protein and calcium. It’s also incredibly versatile and can be eaten on its own, with a range of fruits, sprinkled with chopped nuts or seeds or enjoyed with a spoonful of honey. The best part is due to its thick, creamy consistency, Greek yogurt is very filling and is sure to fully satisfy your appetite between meals.
Summary
If you’ve struggled with unhealthy snacking habits in the past, I hope this article helps you make the necessary changes. These five tips are simple but effective and when you apply them, you’ll notice a significant improvement in your overall health.
Full Body HIIT Weightlifting Workout
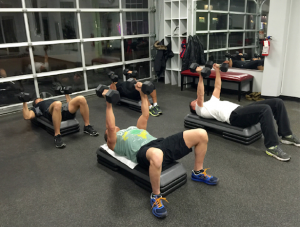
Do you want to fire up your cardiovascular fitness levels while also strengthening and toning your muscles?
If so, you’ll love this full body HIIT (High Intensity Interval Training) weightlifting workout.
It includes 8 weightlifting moves which target all the muscles in your body and are performed at a
fast pace to give you a good cardio workout. To complete the workout, grab a set of light dumbbells
and an adjustable bench, then follow the instructions below. The standard workout takes just 4
minutes to complete but it can easily be extended by repeating the exercises.
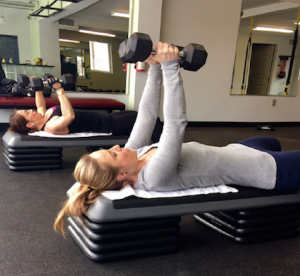
Exercise 1 – Dumbbell Chest Press
The dumbbell chest press builds up your chest, shoulders and triceps. To perform the chest press, follow the instructions below:
- Adjust the bench so that it’s flat.
- Sit up straight on the bench, bend your knees and rest the dumbbells on top of them.
- Lie back on the bench while lifting the dumbbells up above your chest.
- Turn your palms forward and lower the dumbbells down toward your chest, stopping just before they touch your chest.
- Press the dumbbells upward, stopping just before your arms fully lock.
- Repeat steps 4-5 for as many repetitions as you can manage within 20 seconds.
- Sit up, lower the dumbbells down onto the ground, rest for 10 seconds and then move onto the next exercise.
Exercise 2 – Dumbbell Overhead Tricep Extension
The dumbbell overhead tricep extension tones and strengthens your tricep muscles. To perform the dumbbell overhead tricep extension, follow the instructions below:
- Stand up straight, hold a single dumbbell with both hands and then lift it up above your head.
- Keep your elbows parallel with your shoulders, then bend your arms and lower the dumbbell down behind your head, stopping when your elbows are bent at a 90 degree angle.
- Straighten your arms and lift the dumbbell back up to the starting position, stopping just before your arms fully lock.
- Repeat steps 2-3 for as many repetitions as you can manage within 20 seconds.
- Lower the dumbbell down onto the ground, rest for 10 seconds and then move onto the next exercise.
Exercise 3 – Dumbbell Bent Over Row
The dumbbell bent over row works your upper back along with your arms and forearms. To perform the dumbbell bent over row, follow the instructions below:
- Stand up straight and hold a dumbbell in each hand with your palms facing inward.
- Bend forward at the waist until your chest is almost parallel with the ground while keeping your arms, legs and upper body straight.
- Hold the dumbbells out in front of you until they are in line with your chest, bend your knees slightly, then bend your arms and raise the dumbbells up toward your chest, stopping once your arms are fully bent.
- Straighten your arms and lower the dumbbells back down, stopping just before your arms fully lock.
- Repeat steps 3-4 for as many repetitions as you can manage within 20 seconds.
- Lower the dumbbells down onto the ground, rest for 10 seconds and then move onto the next exercise.
Exercise 4 – Alternating Arm Dumbbell Bicep Curl
The alternating arm dumbbell bicep curl is a popular exercise that specifically targets your bicep muscles. To perform the alternating arm dumbbell bicep curl, follow the instructions below:
- Stand up straight with a slight bend in your knees, hold a dumbbell in each hand with your palms facing forward and tuck your elbows into your body.
- Bend your left arm and curl the dumbbell up toward your left shoulder, stopping once your left bicep muscle is fully flexed.
- Straighten your left arm and lower the dumbbell back down to your side.
- Bend your right arm and curl the dumbbell up toward your right shoulder, stopping once your right bicep muscle is fully flexed.
- Straighten your right arm and lower the dumbbell back down to your side.
- Repeat steps 2-5 for as many repetitions as you can manage within 20 seconds.
- Lower the dumbbells down onto the ground, rest for 10 seconds and then move onto the next exercise.
Exercise 5 – Seated Dumbbell Shoulder Press
The seated dumbbell shoulder press is a fantastic compound exercise that primarily targets your shoulders while also working your chest and arms. To perform the seated dumbbell shoulder press, follow the instructions below:
- Adjust the bench so that it’s upright.
- Sit up straight on the bench, bend your knees and rest the dumbbells on top of them.
- Raise the dumbbells up above your shoulders and in line with the side of your head, making sure that your palms facing forward.
- Straighten your arms and press the dumbbells up above your head, stopping just before the dumbbells touch.
- Bend your arms and lower the dumbbells back down above your shoulders and in line with the side of your head.
- Repeat steps 4-5 for as many repetitions as you can manage within 20 seconds.
- Lower the dumbbells down onto the ground, rest for 10 seconds and then move onto the next exercise.
Exercise 6 – Dumbbell Squat
The dumbbell squat is one of the most effective lower body exercises out there. To perform the dumbbell squat, follow the instructions below:
- Stand up straight with a slight bend in your knees, hold a dumbbell in each hand with your palms facing inward and tuck your elbows into your body.
- Bend your arms and curl the dumbbells up toward your shoulders, stopping once your biceps are fully flexed.
- Hold the dumbbells in this position, bend your legs and lower your body down toward the ground, stopping when your butt is in line with your knees.
- Straighten your legs and lift your body back up to the starting position.
- Repeat steps 3-4 for as many repetitions as you can manage within 20 seconds.
- Lower the dumbbells onto the ground, rest for 10 seconds and then move onto the next exercise.
Exercise 7 – Dumbbell Renegade Row
The dumbbell renegade row is a top exercise for your abs and lower back. To perform the dumbbell renegade row, follow the instructions below:
- Put the dumbbells on the ground in front of you.
- Kneel on the ground, put your hands on the dumbbells, straighten your arms, straighten your legs out behind you and tighten your core muscles.
- Lift the left dumbbell off the ground, stopping when it’s in line with your chest.
- Lower the left dumbbell back onto the ground.
- Lift the right dumbbell off the ground, stopping when it’s in line with your chest.
- Lower the right dumbbell back onto the ground.
- Repeat steps 3-6 for as many repetitions as you can manage within 20 seconds.
- Stand up, rest for 10 seconds and then move onto the next exercise or complete the workout.
Workout Summary Chart
| Phase | Exercise | Time (seconds) |
| 1 | Dumbbell Chest Press | 20 |
| 2 | Rest | 10 |
| 3 | Dumbbell Overhead Tricep Extension | 20 |
| 4 | Rest | 10 |
| 5 | Dumbbell Bent Over Row | 20 |
| 6 | Rest | 10 |
| 7 | Alternating Arm Dumbbell Bicep Curl | 20 |
| 8 | Rest | 10 |
| 9 | Seated Dumbbell Shoulder Press | 20 |
| 10 | Rest | 10 |
| 11 | Dumbbell Squat | 20 |
| 12 | Rest | 10 |
| 13 | Dumbbell Renegade Row | 20 |
| 14 | Rest | 10 |
I hope you like this full body HIIT dumbbell workout. For the best results, make sure you perform the workout a maximum of 3 times per week and give your body plenty of time to rest and recover between each workout. Don’t re-attempt the workout until your muscles feel fresh and fully recuperated. You can adjust the length of the workout using the instructions below:
- For a 3.5 minute workout, complete phases 1-14 once
- For a 7 minute workout, complete phases 1-14 twice
- For a 10.5 minute workout, complete phases 1-14 three times
- For a 14 minute workout, complete phases 1-14 four times
- For a 17.5 minute workout, complete phases 1-14 five times
- For a 21 minute workout, complete phases 1-14 six times
- For a 24.5 minute workout, complete phases 1-14 seven times
- For a 28 minute workout, complete phases 1-14 eight times
Honey Cheddar Sourdough Grilled Cheese Recipe
Craving a sweet, tangy, and cheesy breakfast sandwich? Then try this honey cheddar sourdough grilled cheese!
What You’ll Need:
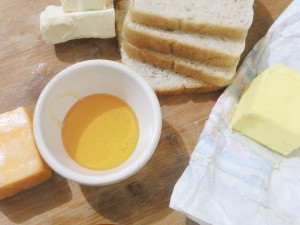
- Sliced sourdough bread
- Honey
- Cheddar slices (use sharp cheddar for best contrast of flavors)
- Butter
- Any easy melting cheese of your choice
Let’s Make Some Awesome Grilled Cheese!
1. Preheat your griddle your pan as you prepare all your ingredients.
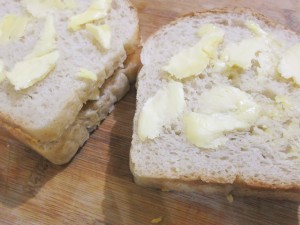
2.Lay down some cheddar slices on a slice of bread (photo shows two sandwiches).
3. Drizzle in some honey, and then add the easy-melt cheese.
4. Add another slice of bread to make a sandwich and spread some butter over it.
5. Place on a hot pan or grill over medium high heat and ‘cook’ each side until well browned and cheese is melted.
6. Slice diagonally and serve up!
7. Make as much as you want or make an entire batch for everyone! You can also make this ahead of time and freeze until you are ready to heat up your pan or grill. Enjoy!
Goat Cheese Quesadilla Recipe
Craving some quesadilla but have only a few ingredients? If you have some tortilla and happen to have some goat cheese or mozzarella, then this recipe is definitely for you!
What You Will Need:
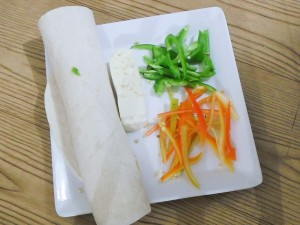
- Flour tortillas (this recipe uses 12 inch diameter flour tortillas)
- 1 small red bell pepper, cut into strips
- 1 small green bell pepper, cut into strips
- 3-4 ounces of goat cheese
Lets Flip Some Quesadillas!
1. Get everything you need ready and set to go.
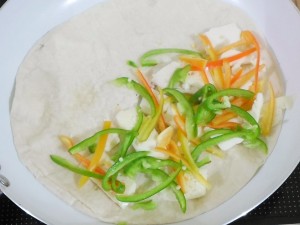
2. Using a non-oiled non-stick pan on medium heat, heat up both sides of the flour tortilla.
3. Place the red and green bell peppers, and the goat cheese on one side of the flour tortilla.
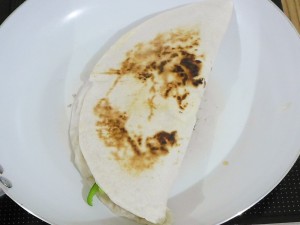
4. Fold the flour tortilla in half and flip until both sides are browned and the cheese have melted.
5. Cut the quesadilla in manageable wedges and serve with hot sauce and mustard for filling meal. This recipe serves two for snack portions and 1 for dinner. What’s great is that you may substitute the goat cheese for mozzarella or other mild cheese, making this dish totally customizable and convenient!
Top 5 Weight Loss Lifestyle Tips
One of the biggest issues people have when trying to lose weight is their lifestyle. They’re fully prepared to eat the right foods and do the appropriate exercises but then life gets in the way and throws all their hard work out of the window. The good news is that with a little planning and consideration, you can burn body fat while also dealing with the challenges that life throws at you. In this article I’m going to be helping you do exactly that by providing you with five of the best weight loss lifestyle tips.
Tip 1 – Exercise In The Morning
Exercising in the morning isn’t the only way to lose weight. However, if you lead a busy lifestyle, exercising first thing ensures that you get your workout in before the pressures of the day set in. Scheduling your workouts for later in the day when you’re already busy makes you a lot less likely to follow through with them. Therefore, if your schedule allows it, make your weight loss workouts the first thing you do when you wake up.
Tip 2 – Prepare Healthy Food In Advance
One of the main reasons people eat unhealthy meals at short notice is because they’re running short on time. They plan to eat healthy but then something comes up at short notice and they don’t have time to put together a healthy meal, so they grab some fast food instead. However, if you set aside some time each week to prepare a batch of healthy meals, then you’ll always have something healthy available for the times you’re in a rush and you’ll never have to resort to fast food as a quick fix again.
Tip 3 – Always Carry Some Workout Clothes
Even when you lead a busy lifestyle, you’ll find that sometimes appointments are cancelled or moved and you’re left with unexpected blocks of free time. These blocks of free time are a fantastic opportunity to get a workout in and burn some extra body fat. However, to take advantage of them, you need to have the right gear close by. Therefore, make a point of always carrying some workout clothes with you, so that if a block of free time opens up during the day at short notice, you’re fully prepared to make the most of it.
Tip 4 – Walk When You Can
Most people don’t walk as much as they could. They take the elevator instead of the stairs and use their car for short journeys that could be easily completed on foot. However, walking burns 240 calories per hour, so by walking whenever you can during the day, you can give your fat loss efforts a notable boost. Just an hour of extra walking per day will burn off over 1,500 calories during the week and over 7,000 calories during the month. So next time you head for the elevator or grab the car keys, think whether that’s really the best decision for losing weight and if possible, turn it into an opportunity to add some extra walking to your day.
Tip 5 – Be Flexible With Your Cheat Meals
One big mistake people make when trying to lose weight is being too rigid with their cheat meals. They decide that one day of the week is their cheat day or allocate certain days and times during the week as cheat meals and then if they end up eating any cheat meals outside of these allocated slots, they feel guilty and disappointed. However, life is spontaneous and things will come up at short notice that make it difficult to stick to your healthy eating plans.
So instead of beating yourself up about these spontaneous cheat meals, adapt your healthy eating schedule and give yourself a 20% cheat meal allowance during the week but don’t allocate dates and times to it. Then when you have a cheat meal at short notice, remove it from your 20% allowance. This approach is much more flexible and allows you to adapt your healthy eating plans based on what life throws at you while still sticking to your healthy eating goals.
Summary
As you can see, with the right attitude, it’s possible to stick to your fat loss goals in any situation. So take another look at these tips, start implementing them today and ensure that your lifestyle doesn’t ever hinder your weight loss goals again.
Frozen Chocolate Covered Banana Treats Recipe
Do you need a quick yet attractive looking treats for your upcoming party or reunion? Or are you finding cool kitchen activities that you love to do with your kids? Or better yet, your kids hate bananas? Then this is the right tutorial for you! Today we will be making a quick, yet fun activity that would definitely catch the attention of your kids or guest. You can make several of these in minutes and you can finish in no time!
This will not only encourage your kids to eat bananas, but this is also a healthy alternative to junk foods that your kids maybe addicted to. So if you are interested, then let us start making this!
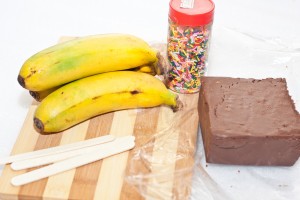
What You’ll Need:
- Several bananas
- A block of sweetened chocolate
- Several popsicle sticks
- Rainbow sprinkles
Method:
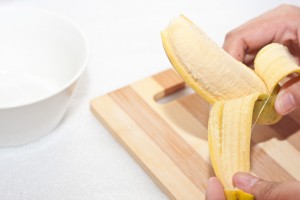
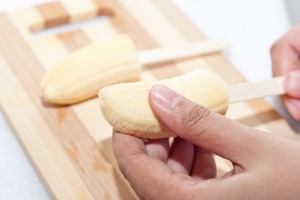
1. Peel the bananas.
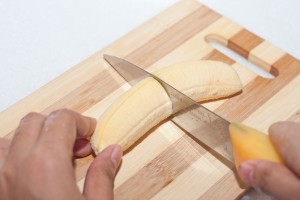
2. Cut the bananas in half.
3. Stick the bananas on the popsicle sticks.
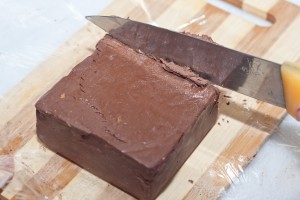
4. Slice the chocolate bar into small pieces and place it in a microwavable bowl or container.
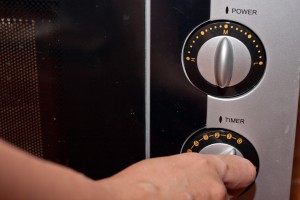
5. Place the chocolate in a microwave oven for 2 to 3 minutes. Make sure to check the chocolate every minute to make sure that the chocolate will melt evenly and prevent it from burning.
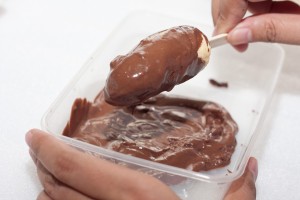
6.Dip the banana on the melted chocolate. Be quick in doing this step since most of the melted chocolate tends to solidify in an instant. That would still vary on the type of chocolate bar you used. You have the option to cover it completely or leave the bottom part bare, it is all up to you.
7. Carefully sprinkle the rainbow sprinkles around the chocolate-covered banana. This is perfectly done when the chocolate is still in its liquid or semi-liquid state. Put the chocolate-covered bananas in the freezer for 30 minutes.
8. Finally done! You can now serve the chocolate covered bananas to your guest or your kids!

